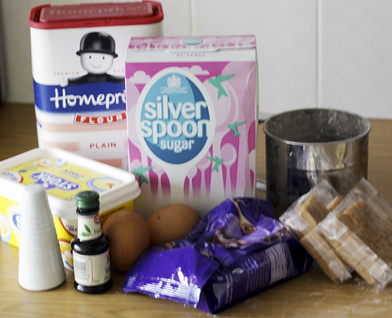
Today I decided to try the Slice and Bake Cookies as they have been bookmarked since before Christmas to make. There are so many droolsome things on the Smitten Kitchen Blog - if you haven't visited before, it's definitely worth a little stop by.
Slice-and-Bake Cookies
Adapted from Dorie Greenspan
Makes about 50 cookies [I got about 28 - maybe I did something wrong!?]
2 sticks (8 ounces; 230 grams) unsalted butter, at room temperature
2/3 cup confectioners’ sugar, sifted [This is icing sugar]
2 large egg yolks, at room temperature
Pinch of salt
1 teaspoons vanilla or almond extract [I personally think it needed more]
2 cups (280 grams) all-purpose flour
Options:
- Mix in grated zest of 2 oranges and 1/2 cup dried cranberries (I finely chopped them)
- Mix in grated zest of 2 lemons; coat with or mix in 1/4 cup poppy seeds (I mixed the poppy seeds in)
- Mix in grated zest of 2 limes; coat with 1/4 cup cornmeal
- Mix in 1/2 cup chopped dried apricots; coat with or mix in 1/2 cup finely chopped pistachios
- Mix in 1/2 cup mini chocolate or peanut-butter chips
- Mix in 1/4 cup finely chopped candied ginger; coat with or mix in 1/4 cup sesame seeds
- Swap ¼ cup of flour for unsweetened cocoa
- Swap ½ to 1 cup of flour for ground almonds, pecans, hazelnuts or walnuts
- [I used 1/3 cup chocolate chunks & 1/3 cup of chopped fudge]

1. Put the butter in the bowl of a mixer fitted with the paddle attachment and beat at medium speed until it is smooth. Add the sifted confectioners’ sugar and beat again until the mixture is smooth and silky. Beat in the egg yolks, followed by the salt and any dried fruits, zest, nuts or seeds. Reduce the mixer speed to low and add the flour, beating just until it disappears. It is better to underbeat than overbeat at this point; if the flour isn’t fully incorporated, that’s okay just blend in whatever remaining flour needs blending with a rubber spatula. Turn the dough out onto a counter, gather it into a ball, and divide it in half. Wrap each piece of dough in plastic wrap and refrigerate for about 30 minutes.
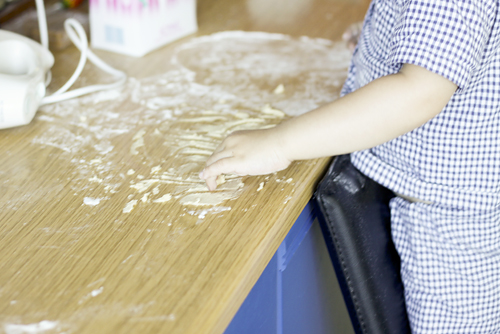
[I would really recommend dusting your surface with flour before putting your dough onto it, as it's quite sticky. I'd also recommend getting your 2 pieces of cling film ready as your fingers will be pretty doughy]
2. Working on a smooth surface, form each piece of dough into a log that is about 1 to 1 1/4 inches (2.5 to 3.2 cm) thick. (Get the thickness right, and the length you end up with will be fine.) Wrap the logs in plastic and chill for 2 hours. (The dough can be wrapped airtight and kept refrigerated for up to 3 days or stored in the freezer for up to 1 month.)
[I read the recipe wrong - the next step says you call roll the log in a coating of your choice before baking it... I did it before chilling it. I put some cocoa on the surface, rolled the log, but the log broke up and I ended up having to re-roll it. I know this would have ruined the pretty effect I was going for, but hey, I got a marbelley kinda thang instead and that's fine! I ended up leaving my log in the fridge for about 5 hours, and I put the other straight in the freezer to pull out when a Smug Mummy moment is needed. I used a kitchen roll tube which I cut a slit into to help it retain its shape in the freezer].
Louis recommends the uncooked dough ;)
3. Position the racks to divide the oven into thirds and preheat the oven to 350°F (180°C). Line two baking sheets with parchment paper. [I only needed one]
4. While the oven is preheating, roll cookie logs in any coatings of your choice. Then, using a sharp slender knife, slice each log into cookies about 1/3 inch (10 mm) thick. (You can make the cookies thicker if you’d like; just bake them longer.) Place the cookies on the lined baking sheets, leaving about 1/2 inch (1.5 cm) space between them. [Well my knife was sharp but Im not sure if it was slender. Either way, they didn't come out like the perfect cute circles on the Smitten Kitchen site - they were kinda squished (see below) I hear a wire is good for cutting it, or popping the log in the freezer for a very little while before cutting.]
[I just worked with what I was getting and reshaped them a bit with my hands, and patted them down slightly as where I'd cut them into squishy shapes, they had fattened up a bit. The recipe says one log should get about 25 cookies, but I got 13 or 14]
5. Bake the cookies for 12 to 14 minutes, or until they are set but not browned. Transfer the cookies to cooling racks to cool to room temperature.
Keeping: Packed airtight, the cookies will keep for about 5 days at room temperature, or in the freezer for a month. Unbaked logs can be frozen for longer.
The cookies really haven't lasted long - they were delicious, and because they are quite small, very easy to eat (not sure if this is a good or bad thing!?) I really enjoyed the flavours when I got to a bit of filling, or the cocoa - but the plain biscuit didn't taste of much. I would definitely add more vanilla if I made them again, and maybe try a different filling, or more than 1/3 cup of the fillings I did choose. The texture was very crumbly, they reminded me of biscuits we used to get given with school dinners, with a bit of sugar on the top and some strawberry milkshake I could have been back in the school canteen! I gather this is the icing sugar that does that - its nice for a change. I have had reports from others that have made these that they have been 'tooth achingly sweet'. I didn't find that at all, but I do have an incredibly sweet tooth!


0 comments:
Post a Comment