Monday 28 March 2011

Easy Peasy Banana Cake

3 comments
This recipe is a firm favourite in our house! I initially got the recipe from an Australian cookbook I was given for a 7th birthday present! I can't tell you the book as I no longer have it. If you like banana cake you have to try this! It's so quick to make - a mere 5 minutes, and there's so little washing up too! 

Ingredients
60g butter
1 tsp vanilla essence
1/4 cup milk
1/2 cup caster sugar
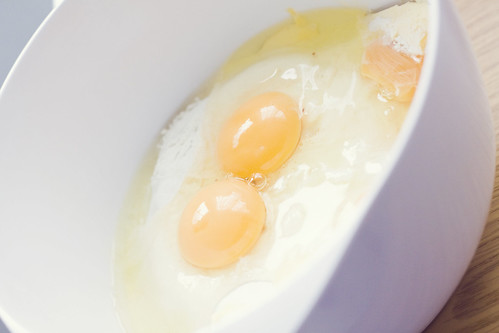
1 egg
1 cup self raising flour
2 ripe bananas, mashed [the original recipe states 1 banana, but I prefer it with 2]


(makes 1 x 20cm cake)


1. Preheat oven to GM4 / 180C / 350F. Grease well a 20cm tin and dust over the inside of the tin with a little flour.

2. Gently melt the butter in a big pan over low heat - dont let it boil!

3. Take off the heat and add sugar, egg & vanilla.


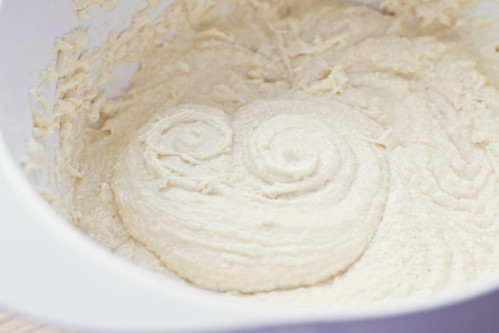
4. Beat it well with a wooden spoon until smooth

5. Sift it flour - don't stir yet!


6. Add milk and mashed banana. Stir until only just mixed.


7. Spread evenly in tin and bake in centre of oven for 30 minutes.
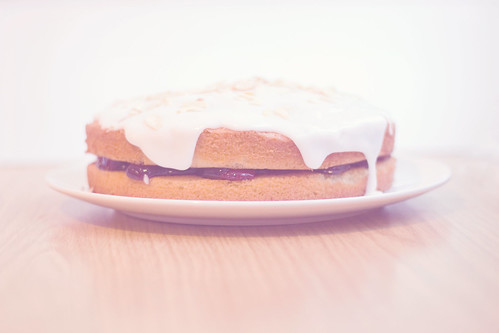
Icing
When cold mix..
1 cup icing sugar
1 tbsp butter
1 tsp lemon juice
1 tsp lemon rind
a little hot water to mix.


[I find this icing a little rich, so either make a more watered down version, or just a simple icing sugar, teaspoon of butter with a little hot water.]


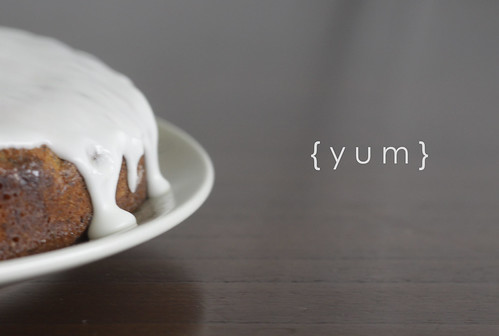
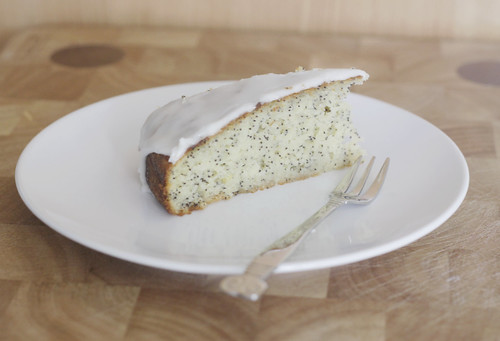
Yum yum yum. The only issue with this cake is it really doesn't last long - it's really moreish and quite light so fairly easy to polish a lot of it off! My neighbour makes this with added nuts and seeds which is also rather delicious.

Please let me know if you make it and what you think of it. 
 

Thursday 22 July 2010

Rocky Road from BBC Good Food

1 comments
I know it's been a while - I'm dieting and this blog makes me want to bake! Baked goods in my house don't last for long when I'm around so it's safer if I just don't!

Happily, I had the opportunity to bake for someone else today! Louis finishes nursery tomorrow so we made a couple of things for him to take in for his teachers, the first being this Rocky Road (or Chocolate Crunch Bar as they like to call it) from the BBC Good Food site.


Cuts into 12.
Ingredients
  • 100g butter , roughly chopped
  • 300g dark chocolate (such as Bournville), broken into squares
  • 3 tbsp golden syrup
  • 140g rich tea biscuits , roughly crushed
  • 12 pink marshmallows , quartered (use scissors)
  • 2 x 55g bars Turkish delight , halved and sliced (or use Maltesers, Milky Way or Crunchie bars) [I used Maltesers and Crunchie]

  1. Gently melt the butter, chocolate and syrup in a pan over a low heat, stirring frequently until smooth, then cool for about 10 mins. [It's important to let this cool for minimum 10 minutes otherwise the marshmallow will melt, which is not what you want!]
     
  2. Stir the biscuits and sweets into the pan until well mixed, then pour into a 17cm square tin lined with foil and spread the mixture to roughly level it. Chill until hard, then cut into fingers. 
It was so easy to do - in fact, the hardest thing I think was chopping up the marshmallow because they were so sticky! Smelt gorgeous too.... not entirely sure how they tasted - I did have a little nibble (shhh!) which was goooooooooood! I put some of them in a jar which I wrapped with ribbon and a parcel tag to take in to school tomorrow. Hopefully they taste as nice as it looked, and I hope the rest of my household eat the remains that we have here - it keeps calling me!

Thursday 11 March 2010

Hummingbird Bakery Banana Loaf

4 comments
Makes 8-10 slices

Ingredients
  • 270g soft light brown sugar
  • 2 eggs
  • 200g peeled bananas, mashed
  • 280g plain flour
  • 1 tsp baking powder
  • 1 tsp bicarbonate of soda
  • 1 tsp ground cinnamon
  • 1 tsp ground ginger
  • 140g unsalted butter, melted

Grease a 23x13cm loaf tin and dust with flour. Preheat the oven to 170C / 325F / GM3


Put the sugar and eggs in a freestanding electric mixer with a paddle attachment (or use a handheld electric whisk) and beat until well incorporated. Beat in the mashed bananas.


Add the flour, baking powder, bicarbonate of soda, cinnamon and ginger to the sugar mixture. Mix it thoroughly until all the dry ingredients have been incorporated into the egg mixture. Pour in the melted butter and beat until all the ingredients ar well mixed. 


Pour the mixture into the prepared loaf tin and smooth over with a palette knife. Bake in the preheated oven for about 1 hour or until firm to the touch and a skewer inserted in the centre comes out clean. Leave the cake to cool slightly in the tin before turning out to a wire cooling rack to cool completely. 


Hmm - not overly impressed with this one. Needless to say, it was polished off pretty darn quick, but at the same time a bit cinnamon & gingery for me. Nice, but not sure if I will make it again. I think I prefer banana cake with my black 'nanas.

Mustard Toad in the Hole

0 comments
I've always loved toad in the hole, but never quite managed to get it right. The batter always goes too crunchy, or there doesnt seem enough batter.... just had never mastered it. I had a packet of sausages in the fridge which needed eating, and after doing a low-carb diet for a while, the last thing I wanted was them in all their sausagey glory, and wanted to disguise them as something delicious, so I checked out the BBC Good Food site for inspiration, and came across this recipe for Mustard Toad in the Hole.

  Serves 4 

Ingredients

Method 

Heat the oven to 200C/fan 180C/gas 6. Put the sausages and onion wedges in an ovenproof baking dish. Drizzle over 2 tbsp oil, season then cook for 20 minutes until everything is browned a little.   

While the sausages are cooking, put the flour and mustard powder in a bowl and season. Gradually whisk in the eggs and milk to make a batter. Pour into the hot dish with the sausages then cook for another 30-40 minutes until crisp and golden. [I did them for 30mins in my oven as it tends to get quite hot and found it the perfect amount of time]. 


I can honestly say that this is the nicest toad in the hole I have ever had the pleasure of eating. Absolutely gorgeous and went down a treat with the Little Man too. I shall definitely be adding this on to my rosta. So simple, yet so delicious 5/5.

Thursday 7 January 2010

Cherry Bakewell Cake

0 comments
A friend of mine mentioned, last week, how much she loved Bakewell Tart. I advised her to try the Cherry Bakewell Tart from BBC Good Food as its absolutely scrummy. Ever since I mentioned it, I have had mega cravings for it, so today, with the help of a 3 year old boy, I made it again...

Serves 8.

Ingredients:

FOR THE CAKE

  • 200g butter , well softened, plus extra for greasing
  • 200g golden caster sugar
  • 100g ground almonds
  • 100g self-raising flour
  • 1 tsp baking powder
  • ½ tsp almond extract or essence
  • 4 large eggs
FOR THE FILLING AND TOP
  • ½ a 340g jar morello cherry conserve
  • 175g icing sugar
  • 5-6 tsp water or lemon juice
  • 1 tbsp ready-toasted flaked almonds

Heat oven to 180C/fan 160C/gas 4 and make sure there's a shelf ready in the middle. Butter and line the bases of 2 x 20cm round sandwich tins with baking paper.

Using electric beaters, beat together all the cake ingredients with a pinch of salt until smooth, then spoon into the tins and level the tops.


Bake for 30 mins or until golden and springy. Don't open the oven before 25 mins cooking time has passed.

When they're ready, cool the sponges for a few mins, then tip out of the tins and cool completely on a wire rack. Make sure the top of one of the cakes is facing up as you'll want a smooth surface for the icing later on.
When cool, put one sponge on a serving plate, then spread with jam. Sandwich the second sponge on top. Sieve the icing sugar into a large bowl. Add the water or lemon juice, then stir until smooth and thick. Spread evenly over the top and let it dribble over the sides. Scatter with the nuts and leave to set for a few mins before cutting.


Ahhh - heaven, it was just as good as I had remembered and got a big thumbs up from the little man too. If you try it, please let me know what you think.

Tuesday 14 July 2009

Hummingbird Bakery Chocolate Brownies

12 comments
I have had the Hummingbird Bakery cookbook for about a month, and today was the first time I've made anything from it. I have often got it out, drooled over the pics, then put it back again, unsure as to what to make first as it all looks so nice.

The brownies looked pretty simple, and 6 days until my due date, simple is what I require!


200g dark chocolate, roughly chopped
175g unsalted butter
325g caster sugar
130g plain flour
3 eggs
icing sugar, to decorate

a 33 x 23 x 5cm baking tray, lined with greaseproof paper

Makes about 12 portions

1. Preheat the oven to 170C / 325F / GM3

2. Put the chocolate an butter in a heatproof bowl over a saucepan of simmering water (do not let the base of the bowl touch the water). Leave until melted and smooth.


3. Remove from the heat. Add the sugar and stir until well incorporated. Add the flour and stir until well incorporated. Finally, stir in the eggs and mix until thick and smooth.


4. Spoon the mixture into the prepared baking tray and bake in the preheated oven for about 30-35 minutes, or until flaky on the top but still soft in the centre. Be careful not to overcook otherwise the edges will become hard and crunchy. Leave to cool completely before dusting with icing sugar, to decorate. [I cooked mine for 30 mins in a fan oven, and I think this was a little too long. Next time I will try 25 minutes, so the middle is a little more gooey, and the edges not so crunchy].


I tried to get a little creative by making a heart shaped stencil to use for the icing sugar stage, but it didn't quite go to plan!

The smell coming from the kitchen while these were cooking was absolutely divine. I had to try one as soon as they were out of the oven and they were indeed, delicious. A couple of weeks ago I discovered a packet mix of Betty Crocker chocolate brownies, for when I was going to make this delicious looking creation, but hadn't got round to - and decided to make them. Betty, yours are not a patch on these!

As I mentioned above, next time I make them, I shall try baking them for less time, to get more goo in the middle of the brownie, which is how I prefer them. And shall also refrain from going mad with icing sugar stencils... a nice delicate dusting would have been preferable!

Monday 29 June 2009

Lemon Drizzle Cake from Cook With Jamie

0 comments
I made this cake yonks ago, and loved it - it's been one I've been meaning to make again, and haven't got round to. As it is, it's absolutely boiling here today, I'm currently 37 weeks pregnant, and trying to keep a 3 year old boy entertained while staying inside and cool, so today we made this cake again - and now I remember why I wanted to make it again - absolutely delicious!


Serves 8-10

ingredients

• 115g unsalted butter, softened
• 115g caster sugar
• 4 large free-range or organic eggs

• 180g ground almonds

• 30g poppy seeds
• zest and juice of 2 lemons

• 125g self-raising flour, sifted

for the lemon syrup

• 100g caster sugar

• 90g lemon juice


for the lemon icing

• 225g icing sugar [I only needed 150g icing sugar, and needed to add about 1tsp of water too]

• zest and juice of 1 lemon


Preheat the oven to 180ºC/350ºF/gas 4. Grease and line the bottom and sides of a 20cm springform cake tin with greaseproof paper.

Using an electric whisk, beat the butter with the caster sugar until light and creamy. Add the eggs one by one, beating each in well. Fold in your ground almonds, poppy seeds, the lemon zest and juice and the sifted flour. Spoon the mix into the prepared cake tin and bake in the preheated oven for 40 minutes or until lightly golden [mine took 30 minutes in a fan oven at 180C]. You can check to see if the cake is cooked by poking a cocktail stick right into the sponge. Remove it after 5 seconds and if it comes out clean the cake is cooked; if slightly sticky it needs a little longer, so put it back in the oven. Allow the cake to cool on a rack.


Make your lemon syrup by heating the sugar and lemon juice in a pan until the sugar has dissolved. While your cake is still warm, make lots of little holes in the top with a cocktail stick and pour your syrup over.

To make your icing, sift the icing sugar into a bowl and add the lemon zest and juice, stirring until smooth. When your cake is almost cool, put it on a serving plate and pour the icing carefully over the top. If you pour it on to the middle of the cake, then let gravity disperse the icing down the sides, you get the ‘drizzle’ effect! Give it a helping hand with a spoon if you want.


It was really quick to make, even with a 3 year old doing most of the work. I don't think it rose (is that the right word? - rose / rised?!) as much as it did when I made it previously, but it wasn't as flat as a pancake, so it'll do. It's a very grown up tasting cake, in my opinion, although judging by the speed Louis wolfed his slice down, it's fine for 3 year olds too! It's very fresh and zingy, and perfect as a Summer cake, if there is such a thing - it just feels like it suits sitting in the garden on a warm day (NOT that I will be partaking in any such activity at the moment!)


I highly recommend this cake - it's one that looks impressive, and like it would have taken a while to make, when in reality its very simple, with minimal washing up - bonus.