Monday, 29 June 2009

Lemon Drizzle Cake from Cook With Jamie

0 comments
I made this cake yonks ago, and loved it - it's been one I've been meaning to make again, and haven't got round to. As it is, it's absolutely boiling here today, I'm currently 37 weeks pregnant, and trying to keep a 3 year old boy entertained while staying inside and cool, so today we made this cake again - and now I remember why I wanted to make it again - absolutely delicious!


Serves 8-10

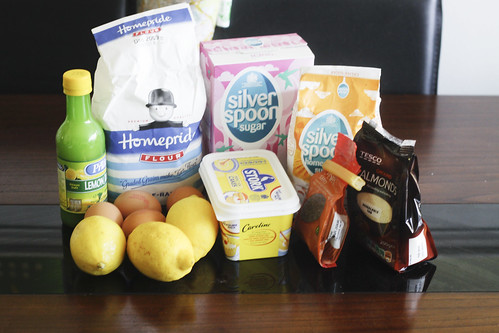
ingredients

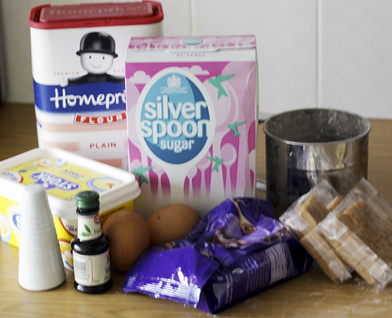
• 115g unsalted butter, softened
• 115g caster sugar
• 4 large free-range or organic eggs

• 180g ground almonds

• 30g poppy seeds
• zest and juice of 2 lemons

• 125g self-raising flour, sifted

for the lemon syrup

• 100g caster sugar

• 90g lemon juice


for the lemon icing

• 225g icing sugar [I only needed 150g icing sugar, and needed to add about 1tsp of water too]

• zest and juice of 1 lemon


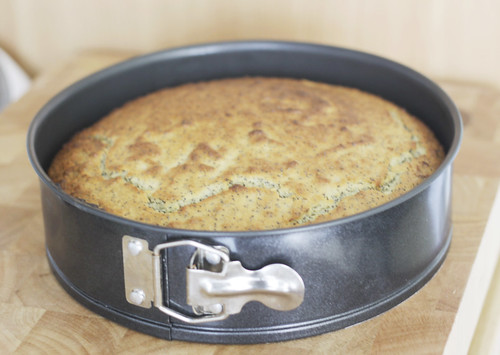
Preheat the oven to 180ºC/350ºF/gas 4. Grease and line the bottom and sides of a 20cm springform cake tin with greaseproof paper.

Using an electric whisk, beat the butter with the caster sugar until light and creamy. Add the eggs one by one, beating each in well. Fold in your ground almonds, poppy seeds, the lemon zest and juice and the sifted flour. Spoon the mix into the prepared cake tin and bake in the preheated oven for 40 minutes or until lightly golden [mine took 30 minutes in a fan oven at 180C]. You can check to see if the cake is cooked by poking a cocktail stick right into the sponge. Remove it after 5 seconds and if it comes out clean the cake is cooked; if slightly sticky it needs a little longer, so put it back in the oven. Allow the cake to cool on a rack.


Make your lemon syrup by heating the sugar and lemon juice in a pan until the sugar has dissolved. While your cake is still warm, make lots of little holes in the top with a cocktail stick and pour your syrup over.

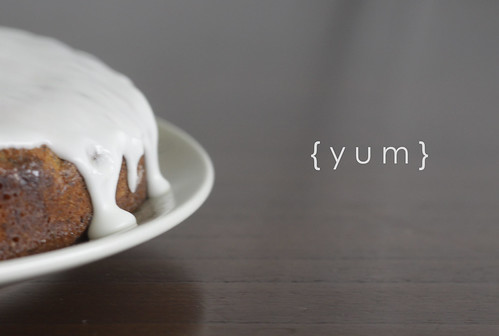
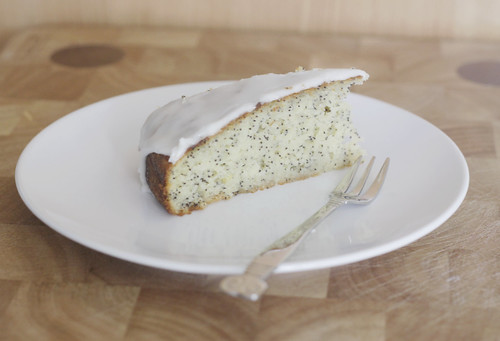
To make your icing, sift the icing sugar into a bowl and add the lemon zest and juice, stirring until smooth. When your cake is almost cool, put it on a serving plate and pour the icing carefully over the top. If you pour it on to the middle of the cake, then let gravity disperse the icing down the sides, you get the ‘drizzle’ effect! Give it a helping hand with a spoon if you want.


It was really quick to make, even with a 3 year old doing most of the work. I don't think it rose (is that the right word? - rose / rised?!) as much as it did when I made it previously, but it wasn't as flat as a pancake, so it'll do. It's a very grown up tasting cake, in my opinion, although judging by the speed Louis wolfed his slice down, it's fine for 3 year olds too! It's very fresh and zingy, and perfect as a Summer cake, if there is such a thing - it just feels like it suits sitting in the garden on a warm day (NOT that I will be partaking in any such activity at the moment!)


I highly recommend this cake - it's one that looks impressive, and like it would have taken a while to make, when in reality its very simple, with minimal washing up - bonus.

Monday, 1 June 2009

Slice n Bake Cookies

0 comments
I know I haven't blogged for a while, I've just been feeling extremely pregnant (read exhausted), and haven't done much in the kitchen worth blogging about!

Today I decided to try the Slice and Bake Cookies as they have been bookmarked since before Christmas to make. There are so many droolsome things on the Smitten Kitchen Blog - if you haven't visited before, it's definitely worth a little stop by.

Slice-and-Bake Cookies
Adapted from Dorie Greenspan

Makes about 50 cookies [I got about 28 - maybe I did something wrong!?]

2 sticks (8 ounces; 230 grams) unsalted butter, at room temperature
2/3 cup confectioners’ sugar, sifted [This is icing sugar]
2 large egg yolks, at room temperature
Pinch of salt
1 teaspoons vanilla or almond extract [I personally think it needed more]
2 cups (280 grams) all-purpose flour

Options:

  • Mix in grated zest of 2 oranges and 1/2 cup dried cranberries (I finely chopped them)
  • Mix in grated zest of 2 lemons; coat with or mix in 1/4 cup poppy seeds (I mixed the poppy seeds in)
  • Mix in grated zest of 2 limes; coat with 1/4 cup cornmeal
  • Mix in 1/2 cup chopped dried apricots; coat with or mix in 1/2 cup finely chopped pistachios
  • Mix in 1/2 cup mini chocolate or peanut-butter chips
  • Mix in 1/4 cup finely chopped candied ginger; coat with or mix in 1/4 cup sesame seeds
  • Swap ¼ cup of flour for unsweetened cocoa
  • Swap ½ to 1 cup of flour for ground almonds, pecans, hazelnuts or walnuts
  • [I used 1/3 cup chocolate chunks & 1/3 cup of chopped fudge]

1. Put the butter in the bowl of a mixer fitted with the paddle attachment and beat at medium speed until it is smooth. Add the sifted confectioners’ sugar and beat again until the mixture is smooth and silky. Beat in the egg yolks, followed by the salt and any dried fruits, zest, nuts or seeds. Reduce the mixer speed to low and add the flour, beating just until it disappears. It is better to underbeat than overbeat at this point; if the flour isn’t fully incorporated, that’s okay just blend in whatever remaining flour needs blending with a rubber spatula. Turn the dough out onto a counter, gather it into a ball, and divide it in half. Wrap each piece of dough in plastic wrap and refrigerate for about 30 minutes.

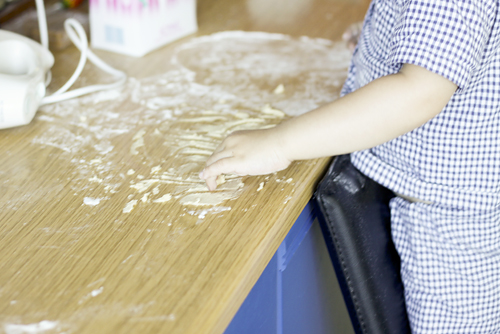
[I would really recommend dusting your surface with flour before putting your dough onto it, as it's quite sticky. I'd also recommend getting your 2 pieces of cling film ready as your fingers will be pretty doughy]

2. Working on a smooth surface, form each piece of dough into a log that is about 1 to 1 1/4 inches (2.5 to 3.2 cm) thick. (Get the thickness right, and the length you end up with will be fine.) Wrap the logs in plastic and chill for 2 hours. (The dough can be wrapped airtight and kept refrigerated for up to 3 days or stored in the freezer for up to 1 month.)

[I read the recipe wrong - the next step says you call roll the log in a coating of your choice before baking it... I did it before chilling it. I put some cocoa on the surface, rolled the log, but the log broke up and I ended up having to re-roll it. I know this would have ruined the pretty effect I was going for, but hey, I got a marbelley kinda thang instead and that's fine! I ended up leaving my log in the fridge for about 5 hours, and I put the other straight in the freezer to pull out when a Smug Mummy moment is needed. I used a kitchen roll tube which I cut a slit into to help it retain its shape in the freezer].

Louis recommends the uncooked dough ;)

3. Position the racks to divide the oven into thirds and preheat the oven to 350°F (180°C). Line two baking sheets with parchment paper. [I only needed one]

4. While the oven is preheating, roll cookie logs in any coatings of your choice. Then, using a sharp slender knife, slice each log into cookies about 1/3 inch (10 mm) thick. (You can make the cookies thicker if you’d like; just bake them longer.) Place the cookies on the lined baking sheets, leaving about 1/2 inch (1.5 cm) space between them. [Well my knife was sharp but Im not sure if it was slender. Either way, they didn't come out like the perfect cute circles on the Smitten Kitchen site - they were kinda squished (see below) I hear a wire is good for cutting it, or popping the log in the freezer for a very little while before cutting.]

[I just worked with what I was getting and reshaped them a bit with my hands, and patted them down slightly as where I'd cut them into squishy shapes, they had fattened up a bit. The recipe says one log should get about 25 cookies, but I got 13 or 14]

5. Bake the cookies for 12 to 14 minutes, or until they are set but not browned. Transfer the cookies to cooling racks to cool to room temperature.

Keeping: Packed airtight, the cookies will keep for about 5 days at room temperature, or in the freezer for a month. Unbaked logs can be frozen for longer.

The cookies really haven't lasted long - they were delicious, and because they are quite small, very easy to eat (not sure if this is a good or bad thing!?) I really enjoyed the flavours when I got to a bit of filling, or the cocoa - but the plain biscuit didn't taste of much. I would definitely add more vanilla if I made them again, and maybe try a different filling, or more than 1/3 cup of the fillings I did choose. The texture was very crumbly, they reminded me of biscuits we used to get given with school dinners, with a bit of sugar on the top and some strawberry milkshake I could have been back in the school canteen! I gather this is the icing sugar that does that - its nice for a change. I have had reports from others that have made these that they have been 'tooth achingly sweet'. I didn't find that at all, but I do have an incredibly sweet tooth!

Tuesday, 12 May 2009

Lasagne from Jamie Oliver's Ministry of Food

2 comments
(Serves 4-6)

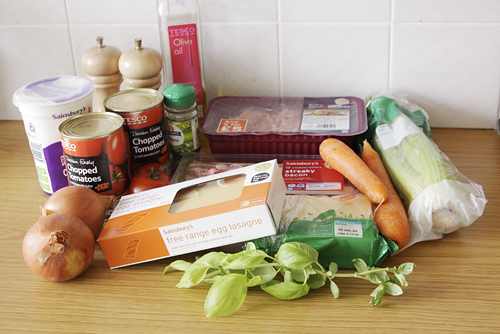
Ingredients

For the Bolognese Sauce

2 rashers of streaky bacon
2 medium onions
2 cloves of garlic
2 carrots
2 sticks of celery
olive oil
2 heaped teaspoons dried oregano
500g good quality minced beef, pork, or (even better!) a mixture of the two [I used beef]
2 x 400g tins of chopped tomatoes
sea salt & freshly ground black pepper
a small bunch of fresh basil
50g Parmesan cheese [I don't like Parmesan, so I replaced this with Cheddar]

For the lasagne

250g dried egg lasagne sheets
1 x 500ml tub of creme fraiche
100g Parmesan cheese [again, I subbed this for Cheddar]
1 large ripe tomato


To make your Bolognese sauce

Finely slice your bacon [I find scissors good for this].
Peel & finely chop the onions, garlic, carrots and celery - don't worry about technique; just chop away.
Place a large casserole-type pan on a medium to high heat, add 2 lugs of olive oil, your sliced bacon and the oregano and cook and stir until the bacon is lightly golden.
Add the veg to the pan and stir every 30 seconds for around 7 minutes or until softened and lightly coloured.


Stir in the minced meat and the tinned tomatoes. Fill one of the empty tins with water and add to the pan [I only used half a tin of water, as I've made Jamie's Bolognese before and found it a little wet for my liking]. Stir in a good pinch of salt and pepper.
Pick the basil leaves and place in the fridge for later. Finely chop the basil stalks and stir into the pan [again, scissors are good for this].
Bring to the boil, then turn the heat down and simmer with a lid on for 45 minutes, stirring every now and again to stop it catching.

To finish the sauce

Preheat the oven to 190C / 375F / GM5. Remove the Bolognese sauce from the heat. Finely grate the Parmesan and stir a quarter of this into the sauce [I wasn't sure if he meant 1/4 of the 50g allocated for the sauce, or 1/4 of the whole amount of cheese - I went with the whole amount].
Tear and stir in any larger basil leaves, keeping the smaller ones aside for later. Have a taste of the sauce, and season with a little more salt and pepper if you think it needs it.
Boil some water in a kettle and pour it into a pan, then add all your lasagne sheets with a drizzle of olive oil and blanch (slightly soften) for 3 to 4 minutes.


Drain the sheets in a colander and carefully pat them dry with some kitchen paper to absorn any excess water.

To make your lasagne

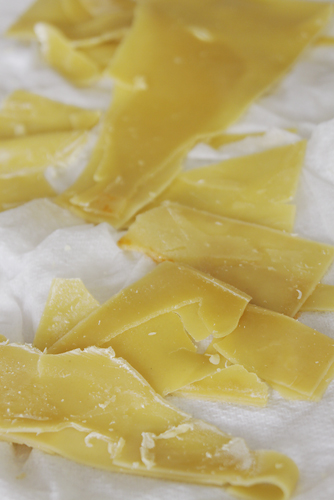
Spoon a third of your Bolognese sauce into the bottom of an earthenware ovenproof dish. Follow with a layer of lasagne sheets. [Here, I encountered a problem. My sheets were stuck together! I don't know what I could have done to prevent this - rinse in cold water afterwards? Anyway, I managed to get round this by using a knife, very carefully, and splitting them apart. By the end it was too tricky. Luckily I had another packet of lasagne sheets so I used them for my last layer as there was no way this was working for me - see below!]


Dollop over a third of your creme fraiche and smooth it out to cover the lasagne sheets. Sprinkle with a good pinch of salt and pepper and another quarter of your grated Parmesan. Add another layer of lasagne, and repeat the layers twice more, finishing with a layer of creme fraiche and the remaining Parmesan.

Top with some slices of tomato, scatter over the small basil leaves and drizzle with olive oil.


Cover with foil, place in the preheated oven and bake for 20 minutes.
After that, remove the foil and cook for a further 35 minutes until the lasagne is bubbling and golden.
Serve on the table with a fresh green salad and let everyone help themselves.


When I was trying to work out how long to allow for making this, I somehow hadn't read the 45 minutes for the Bolognese sauce, and thought it would be ready in time for Louis to have some too. As it was, it took almost 3 hours including prep and cooking time. I am pleased to announce it was worth the wait! Definitely not one I can rustle up after a day at work, but if I have the time and in need of some lovely tasty comfort food then I will come back to it. The bonus is that Jack and I both have lunch for work tomorrow now, and Louis might be in luck too! If I'm feeling generous to myself I might even make a 'spare' one and freeze it for after I have the baby - oooh that would be a treat! Yet again, another successful recipe from 'Ministry of Food', seriously, nothing has turned out bad from it yet.

Tuesday, 5 May 2009

Harissa-Spiced Lamb Burgers with Sweet Potato Wedges

1 comments
(Serves 4)

Ingredients

Heat the oven to 200C/fan 180C/gas 6. Toss the sweet potato wedges with 1 tbsp olive oil and some salt. Put on a baking tray in the oven and cook for 20-25 minutes until tender.

Mix together the lamb, onion and harissa and season really well. Form into 4 burgers. Griddle or grill for 4-5 minutes on each side until cooked through. Mix the cucumber into the yogurt and season.

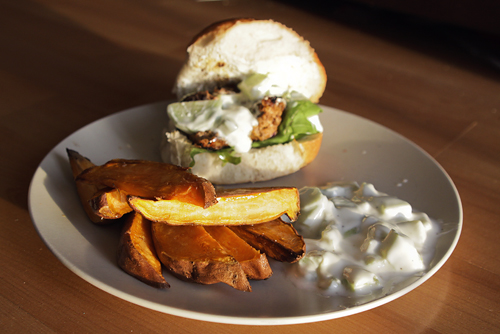
Put the burgers into the buns on top of some rocket leaves. Put a dollop of the yogurt on each burger and serve the rest on the side with the sweet potato wedges.


Gosh, you wouldn't believe I make money from photography would you!? In my defense, as soon as I've cooked I just want to eat, so take a quick snap and gobble before it gets cold!

So, tonight's dinner was as above. I just happened to stumble upon the recipe as I was browsing the BBC Good Food Site and thought it looked like my cup of tea. I am a big harissa fan, so to find another use for it is fab.

I was surprised to find how easy the burgers were to make - it was literally a case of bunging in the lamb, the onion and harissa, mixing them all up, et voila. The smell of them cooking took me right back to my school days - lamb kofte on a Thursday. I do love lamb, it's my favourite meat for roasting, and chops... but I don't think I would choose to cook minced lamb in lump-form again like this, as it just reminds me too much of school dinners.

Don't get me wrong - the dinner was lovely, I don't think I'd do it again for myself. I'm 99% sure when Jack has his when he's in from work, he will l-o-v-e love it, Im just not a minced-lamb-in-lump-form fan, which I evidently forgot until the reminiscent aromas hit me.

I did, however, discover an absolutely delicious accompaniment to meals in the sweet potato wedges - I've never tried them like that before, and they went just perfectly with the cucumber and yoghurt dip. I will 100% be making them again, with the dip, and might even try a little harissa in with the youghurt.

Monday, 4 May 2009

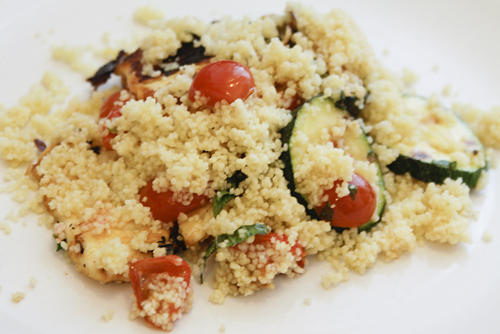
Summer Couscous Salad

0 comments
A while ago I was scouting for halloumi recipes - I always do the same thing with it, and a friend that lives in Cyprus gave me this recipe. I have made it a couple of times before, each time with great success. Jack is a bit of a meaty-man, but it's good enough for him for dinner without any meat accompaniments!

(Serves 4)

Ingredients
For the Dressing

1. Tip the couscous into a bowl, pour the boiling stock over and mix well with a fork. Cover with a plate and leave for 4 minutes. Meanwhile, tip all the dressing ingredients into a bowl and mix well. Fluff up the couscous with a fork, stir in the chickpeas and follow with half the dressing. Mix well and pile on to a large serving dish.

2. Heat 1 tbsp oil in a large frying pan and fry the courgette slices over a high heat for 2-3 minutes until dark golden brown. Lift out on to kitchen paper. Now put the tomatoes cut-side down into the pan, and cook for another couple of minutes until tinged brown on the underside. Top the couscous with the courgettes and then the tomatoes.

3. If the pan is dry, pour in a little more oil and heat it up, then add the halloumi strips and fry for 2-3 minutes, turning them over from time to time, until crisp and sizzled brown. Pile on top of the tomatoes, and drizzle with the remaining dressing. Serve as soon as possible.


I make it without chickpeas as I really don't like them. Humous is fine, chickpeas just ming! I think it stems back to when I was on a diet that chickpeas were 'unlimited' on, so I made a cake out of them. Errrrrrgh. It's still gorgeous without them, I don't feel I'm missing anything from the dish.

I have seen on the BBC site that people have left comments saying they have added harissa to the dressing, and have added green beans to the salad - I think both sound lovely and I will try them over the summer.

This dish is great as a salad for BBQs, or as a main course in it's own right. It even makes me wish I was working tomorrow so I could take the leftovers as a packed lunch... twisted right?! Be warned - it's VERY garlicy. VERY delicious too.

Saturday, 2 May 2009

Chocolate Croissants from Nigella Express

2 comments
I saw Nigella Lawson making her Chocolate Croissants on her Nigella Express programme a while ago and thought they looked really easy, really yummy, and like a really lazy kind of recipe (my kind of recipe!) I don't have the Nigella Express book, but managed to find the recipe by the power of Google.

(Makes 12)

Ingredients

  • 1 (13-ounce) packet ready rolled butter puff pastry
  • 1 (100-gram) chocolate bar (milk or dark depending on taste)
  • 1 egg beaten

Directions

Preheat the oven to 425F/220C. Unfurl the sheet of pastry and then cut it into 6 squares.

Cut each square diagonally to give 2 triangles (they will appear quite small). Put the triangle with the wider part facing you and the point away from you.

Break off small pieces of chocolate (approx.1cm/half inch) to place about 2cm/3/4-inch up from the wide end nearest you.

Then carefully roll from that chocolate loaded end towards the point of the triangle.

You should now have something resembling a straight croissant, seal it slightly with your fingertips and curl it around into a crescent.

Place the chocolate croissants on a lined baking tray and paint with the beaten egg. Bake for 15 minutes until golden and puffy and exuberantly, if miniaturely, croissant-like.


I used (Green & Blacks) dark chocolate, which was a little bitter for the less developed taste-buds in my house. Yes they were very very easy - but not very very yummy. There seemed to be a lot of spare pastry at the ends where the chocolate hadn't got that far. I much prefer shop-bought chocolate croissants, and they're far cheaper too. I won't bother making these again. This is one instance where home baked is not best. 1/5.


****EDIT****

Ok, it's 2 days later - the croissants have all gone. I might have lied when I said Louis didn't like them - he polished them off sharpish! For me they don't compare to shop-bought croissants. For Louis they were fine, he loved them, and they are probably better for him. Still not sure if that would sway me into making them again though!

Tuesday, 28 April 2009

Bacon & Pea Risotto

0 comments
I do love a good risotto. I have never made one before - for some reason I had always though they were really complicated to make, but this recipe by Mary Cadogan proved me wrong.

Ingredients
1
onion
6 rashers streaky bacon , chopped
300g risotto rice

1l hot vegetable stock

100g frozen peas

Finely chop the onion. Heat 2 tablespoons of olive oil and a knob of butter in a pan, add the onions and fry until lightly browned (about 7 minutes). Add the bacon and fry for a further 5 minutes, until it starts to crisp.

Add the rice and stock, and bring to the boil. Stir well, then reduce the heat and cook, covered, for 15-20 minutes until the rice is almost tender.

Stir in the peas, add a little salt and pepper and cook for a further 3 minutes, until the peas are cooked. Serve sprinkled with freshly grated parmesan and freshly ground black pepper.


It was really easy to make - the fact it uses only 5 ingredients added to the simplicity, and there wasn't really much to do - just chop a couple of things up then leave it to do it's stuff.

The result is a mixed bag. I thought it was really nice. I didn't love it, but it was nice. Jack thought it didn't taste of much and was a bit samey - but then I guess risotto is a bit samey. Louis had one mouthful and refused to have any more. This could have been due to the tonne of grated cheddar he'd dumped on the top. So, not such a huge success, but I'm happy because it means I have some lunch to take to work with me tomorrow! I would make it again for myself, but I think I'll try out a couple of other recipes in the meantime.